Marshmallows

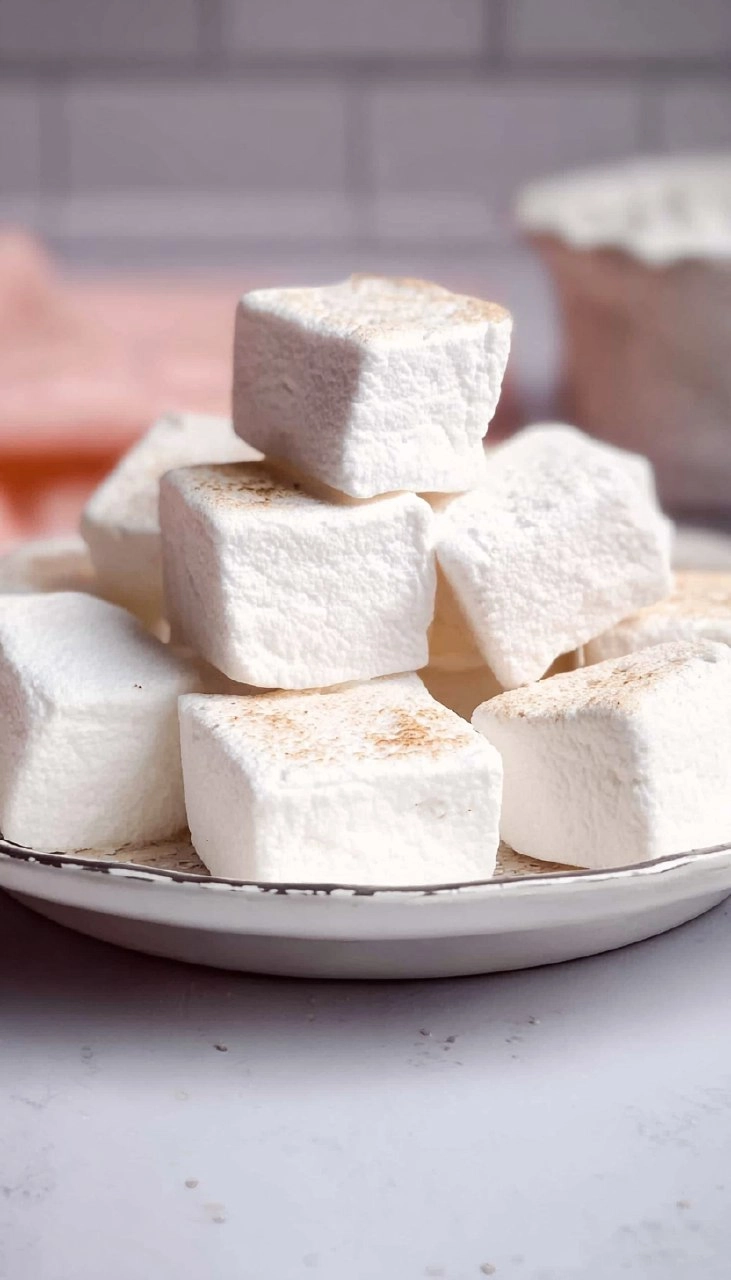
Homemade marshmallows are the epitome of sweet nostalgia, taking us back to simpler times filled with campfires, cocoa, and warm family gatherings. There’s something truly magical about biting into one of these fluffy confections, which offer a delightful contrast of chewy, pillowy texture and airy sweetness. The homemade version is incredibly easy to whip up, and the satisfaction you’ll feel when making them from scratch is unparalleled. Forget the store-bought options; once you’ve tasted these, you won’t want anything else.

I remember the first time I made homemade marshmallows — it was an adventure in my tiny kitchen, a whirlwind of sugar and laughter. Friends watched in awe as I whipped the mixture into a glorious fluffy cloud, and the joy that followed was absolutely contagious. What I love most is that they’re not just for roasting over a fire or floating atop a cup of hot cocoa; they can be tossed into desserts, eaten as a sweet snack, or even gifted during the holidays. Simple, budget-friendly, and utterly customizable, these marshmallows are something everyone can enjoy, and I can’t wait for you to try them.
Table of Contents
Why You’ll Love This Recipe
- Simple & Quick: In just about 10 minutes of prep time and 3 hours to set, you can have delicious marshmallows ready to enjoy.
- Irresistible Flavor: These marshmallows have a subtle sweetness with a velvety texture that melts in your mouth.
- Eye-Catching Appeal: They are pure white, fluffy, and perfect for any occasion, adding a touch of village charm.
- Flexible Serving: Whether for snacking, parties, or desserts, these are a delightful treat anytime.
- Diet-Friendly Options: Easily adapted for gluten-free or vegan diets with the right ingredients.
Ingredients You’ll Need
- 3/4 cup granulated sugar: Adds sweetness and structure. Use standard granulated sugar for the best results.
- 1/3 cup light (clear) corn syrup: This helps to stabilize the marshmallow and prevent crystallization. If unavailable, you can substitute with honey.
- Pinch of salt: Enhances flavor; don’t skip it!
- 6 tablespoons cool water: Essential for hydrating the gelatin and creating the right consistency.
- 1 packet (2 1/2 teaspoons) unflavored gelatin powder: This is what gives marshmallows their classic chewy texture. Be sure to use unflavored gelatin and not a flavored variety.
- 1/2 teaspoon vanilla extract: Provides a warm, comforting flavor. Feel free to use almond or peppermint extract for variations.
- 3/4 cup powdered sugar: Used for dusting and prevents marshmallows from sticking together. Keep some extra on hand for rolling.
How to Make Marshmallows
- Prepare the Pan: Line an 8 or 9-inch loaf pan with parchment paper and spray with nonstick spray; this ensures easy removal later.
- Make the Sugar Syrup: In a medium saucepan, mix together 3/4 cup granulated sugar, 1/3 cup light corn syrup, a pinch of salt, and 3 tablespoons of the cool water. Bring this mixture to a boil over high heat without stirring.
- Check the Temperature: Clip a candy thermometer to the side of the pan and boil the syrup until it reaches 238 degrees Fahrenheit. This is the soft-ball stage, critical for marshmallow consistency.
- Bloom the Gelatin: While the syrup is boiling, pour the remaining 3 tablespoons of cool water into a large bowl and sprinkle the 2 1/2 teaspoons of unflavored gelatin on top. Let it sit for several minutes without stirring to bloom the gelatin.
- Mix Together: Once the syrup reaches temperature, slowly stream it into the bloomed gelatin while continuously beating with a hand mixer. A steady hand is key here; be careful not to splash the syrup.
- Beat Until Fluffy: Continue to beat the mixture for a full 10 minutes. This is where the magic happens and the marshmallow develops its fluffy texture.
- Add Flavor: Stir in the 1/2 teaspoon of vanilla extract until fully combined, adding another layer of irresistible flavor.
- Spread the Mixture: Transfer the marshmallow mixture into your prepared loaf pan, spreading it evenly with a spatula.
- Let It Set: Allow the mixture to set uncovered for at least 3 hours. Patience is essential, but the results are worth it!
- Cut and Coat: To cut, sprinkle powdered sugar on a clean work surface. Flip the marshmallow slab out of the pan and slice into desired shapes. Dip the knife in powdered sugar between cuts to prevent sticking. Ensure all edges are rolled in powdered sugar to keep them from being sticky.
Storing & Reheating
Store homemade marshmallows in an airtight container at room temperature for up to 2-3 days. For extended freshness, you can refrigerate them in a sealed bag for about a week. If you prefer freezing, wrap them tightly and stash them in the freezer for up to 3 months. When ready to indulge, let them thaw at room temperature, though note that freezing may slightly alter their fluffy texture.
Chef’s Helpful Tips
- Avoid crystallization by making sure your saucepan is clean. Any residual sugar can affect your final product.
- Ensure that your candy thermometer is calibrated correctly for accurate temperature readings.
- If you’re looking for a stronger flavor, consider infusing the cool water with vanilla beans or mint for a special twist.
- Always use a hand mixer for more control over the marshmallow consistency and reducing the risk of splatter.
- For peak freshness, serve them within a few days, but they can also be enjoyed over time if stored correctly.
Luscious homemade marshmallows offer not only a peek into nostalgia but also a canvas for creativity! Use this recipe as a base, and don’t hesitate to experiment with flavors, like adding matcha powder for a unique green tea twist or incorporating fun mix-ins like chocolate chips or nuts.
These marshmallows invite you to tap into your inner kid, sharing sweet moments with loved ones. Whether you enjoy them in a hot drink, as a topping for desserts, or munch on them just because, I hope you savor every fluffy bite.
Recipe FAQs
Can I make these marshmallows vegan?
Can I add flavorings to these marshmallows?
Why did my marshmallows turn out sticky?
How can I use these marshmallows in recipes?
⭐ If you make my Marshmallows recipe, Awesome! I would love to hear from you. Please give it a star rating and review below! 👇

Marshmallows
Enjoy these delightful homemade marshmallows featuring a simple process that results in light, fluffy treats! Ideal for additions to hot cocoa or for snacking.
- Prep Time 10 minutes
- Cook Time 200 minutes
- Yield 8 servings 1x
Ingredients
- 3/4 cup granulated sugar
- 1/3 cup light (clear) corn syrup
- pinch of salt
- 6 tablespoons cool water
- 1 packet (2 1/2 teaspoons) unflavored gelatin powder
- 1/2 teaspoon vanilla extract
- 3/4 cup powdered sugar
Instructions
- Line an 8 or 9-inch loaf pan with parchment paper and spray with nonstick spray.
- In a medium saucepan, mix the granulated sugar, corn syrup, salt, and 3 tablespoons of water. Heat on high and bring to a boil without stirring. Use a candy thermometer to boil until it reaches 238°F.
- In a large bowl, add the remaining 3 tablespoons of water and sprinkle the gelatin on top. Let it sit for a few minutes without stirring.
- Once the sugar syrup reaches 238°F, slowly stream it into the gelatin mixture while continuously beating with a hand mixer. Be careful not to splash syrup on the bowl's edges.
- Beat the mixture for a solid 10 minutes until thick and fluffy.
- Stir in the vanilla extract until well combined.
- Pour the mixture into the prepared loaf pan.
- Allow it to set uncovered for at least 3 hours.
- To cut, sprinkle powdered sugar on a work surface. Turn the marshmallows onto the surface and slice, dipping your knife in powdered sugar to prevent sticking. Roll edges in powdered sugar.
- Store the marshmallows in an airtight container at room temperature for 2-3 days.
Notes
Ensure the sugar syrup reaches exactly 238°F for the perfect texture.
Experiment with different extracts like peppermint for a unique flavor.
Cutting the marshmallows can be messy; use a sharp knife and keep it dusted with powdered sugar.
Nutrition
- Serving Size: 1 marshmallow
- Calories: 80
- Sugar: 16g
- Sodium: 5mg
- Fat: 0g
- Saturated Fat: 0g
- Unsaturated Fat: 0g
- Trans Fat: 0g
- Carbohydrates: 20g
- Fiber: 0g
- Protein: 0g
- Cholesterol: 0mg
Nutritional information is an estimate. The nutritional values for your final dish may vary based on measuring differences and products used.